Restores
A restore pulls a backup archive out of S3 and extracts it into a directory inside a target pod. Use it to:
- Recover from a pod that crashed or got terminated.
- Migrate work from one pod to a different (often cheaper or different-GPU) machine.
- Boot a new pod that already has yesterday's checkpoints, datasets, or weights ready to go.
Two ways to restore
Option 1 — Restore into a running pod
Use this when your current pod is fine and you want yesterday's data back, or when you're moving data into a pod that's already running.
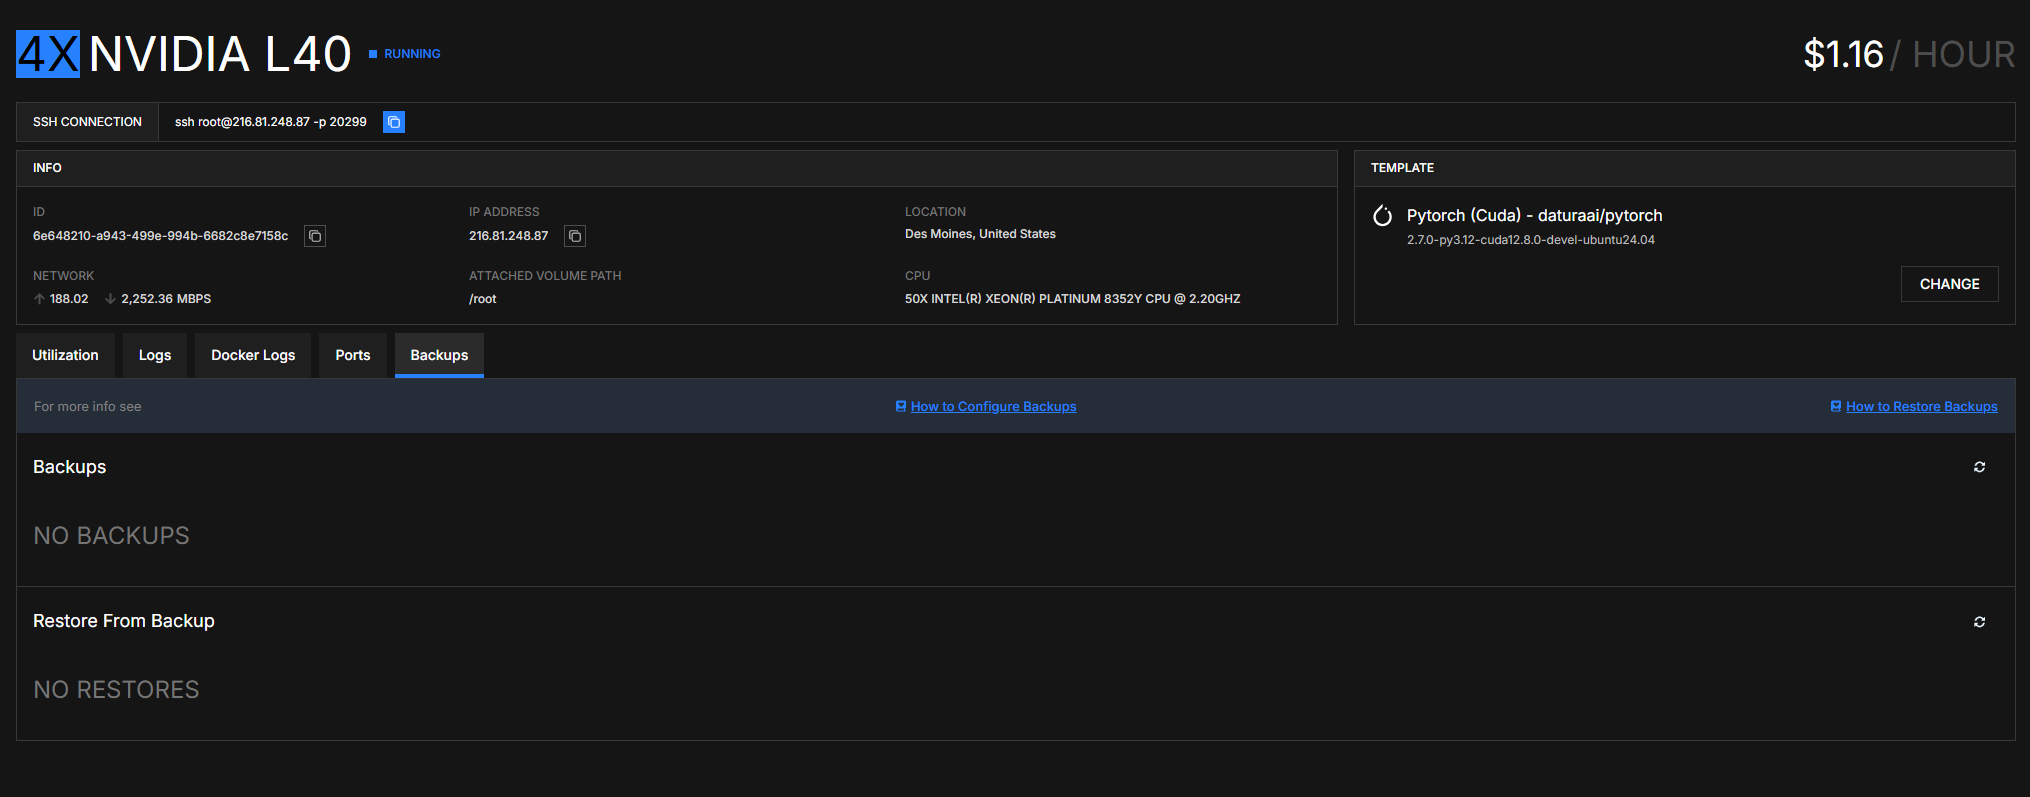
- Open the pod's detail page.
- Click the Backups tab.
- Find the backup row you want and click Restore.
- The modal asks for:
- Target pod — the pod where the archive will be extracted.
- Restore Path — a subfolder of the target pod's local volume mount (
/rootby default).
- Confirm.
The archive downloads from S3, extracts into restore_path, and progress shows up on the pod's Backups tab → Restore From Backup section.
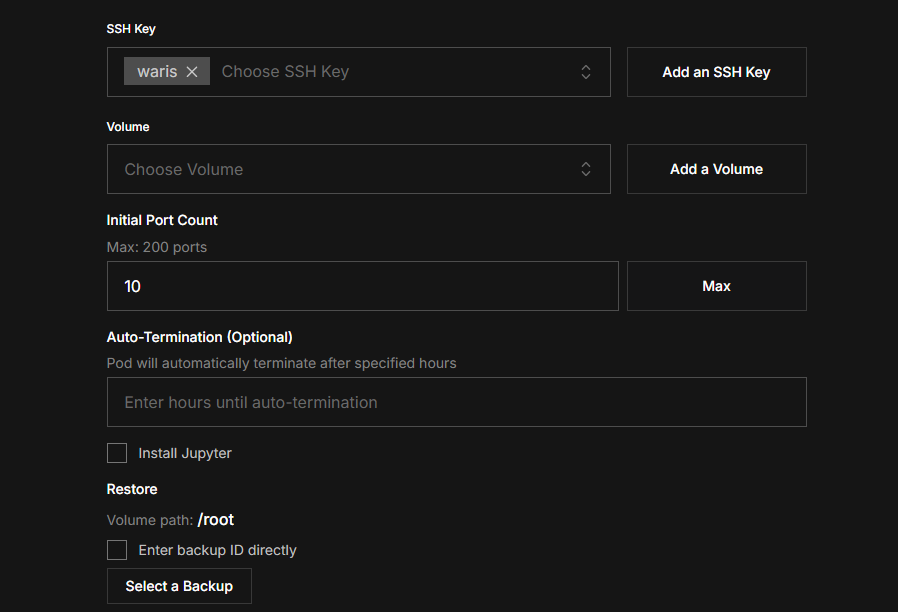
Option 2 — Restore on a new pod's first boot
Use this when you're starting a fresh pod and want it to come up with the backed-up data already in place.
- Browse Pods → click RENT NOW on a row.
- On the Create Pod page, scroll to Restore near the bottom.
- Volume path is fixed to
/root(or whatever the chosen template's local volume mount is). - Click Select a Backup to pick from your archives, or tick Enter backup ID directly to paste a UUID.
- Click Deploy. The new pod boots, the agent extracts the archive into the volume path, and SSH lights up once everything is in place.
Restore path: the rule that matters
The restore path must be a subfolder of the target pod's local volume mount — the same rule as backups. The default mount is /root.
✅ Valid restore paths
/root                       # extract over the whole local volume
/root/models                # subdirectory
/root/checkpoints           # subdirectory
/root/project/data          # nested subdirectory
❌ Invalid restore paths
/home/user/documents        # not under the local volume mount
/tmp                        # tmpfs — wiped on pod restart, the restore wouldn't survive
/var/log                    # system directory
/mnt                        # external Volume — restore is for the local volume only
/mnt/datasets               # same as above
If the backup was taken at /root then the archive's top-level paths look like models/…, checkpoints/…. Extracting that archive into /root puts everything back where it was. Extracting it into /root/from-backup nests it one level deeper — useful when you want to compare or merge.
Watch progress
Both flows write a restore log that you can read on:
- The pod detail page → Backups tab → Restore From Backup section.
The log includes status (pending, running, completed, failed), timestamps, and a progress field that ticks from 0.0 to 1.0 as the archive extracts.
What restore does (and doesn't do)
- It overwrites files in the restore path that share names with the archive's contents.
- It does not delete files in the restore path that aren't in the archive — so partial backups won't wipe your other data.
- It does not restart the container — your processes keep running. Restart the daemon yourself if you need it to re-read files.
- It does not restore environment variables, ports, or template settings — only filesystem contents under
restore_path.
When restores fail
The restore log surfaces an error message. Most common reasons:
- Backup expired or deleted. Check the backup row's Status on the global Backups page.
- Restore path outside the volume mount. Same rule as backups — see above.
- Disk full on the target pod. Check
df -h /rootinside the pod. - Pod has no agent SSH key. The agent needs SSH to drive the extraction; see the Skip agent SSH key option on Create Pod.
First, you need a backup
Restores require an archive that already exists. If you haven't set one up yet, see Backups — it takes about 30 seconds to configure.
For agents and automation: API + CLI
# Trigger a restore into a running pod
curl -X POST https://lium.io/api/restores \
  -H "X-API-Key: $LIUM_API_KEY" \
  -H "Content-Type: application/json" \
  -d '{
    "backup_log_id": "<backup-log-uuid>",
    "target_pod_id": "<target-pod-uuid>",
    "restore_path": "/root"
  }'

# Read restore status
curl https://lium.io/api/restore-logs/<restore_log_id> \
  -H "X-API-Key: $LIUM_API_KEY"

# List restores for a pod
curl https://lium.io/api/restore-logs?pod_id=<pod_id> \
  -H "X-API-Key: $LIUM_API_KEY"
The agent on the pod posts progress to PUT /restore-logs/{id}/progress so the UI can show a percentage. CLI: lium bk restore <pod> --id <backup_id> (use lium bk logs to see job status). Get an API key first.