Create a pod
Walk-through of the Create Pod page at lium.io. You land here when you click RENT NOW on a row in Browse Pods.
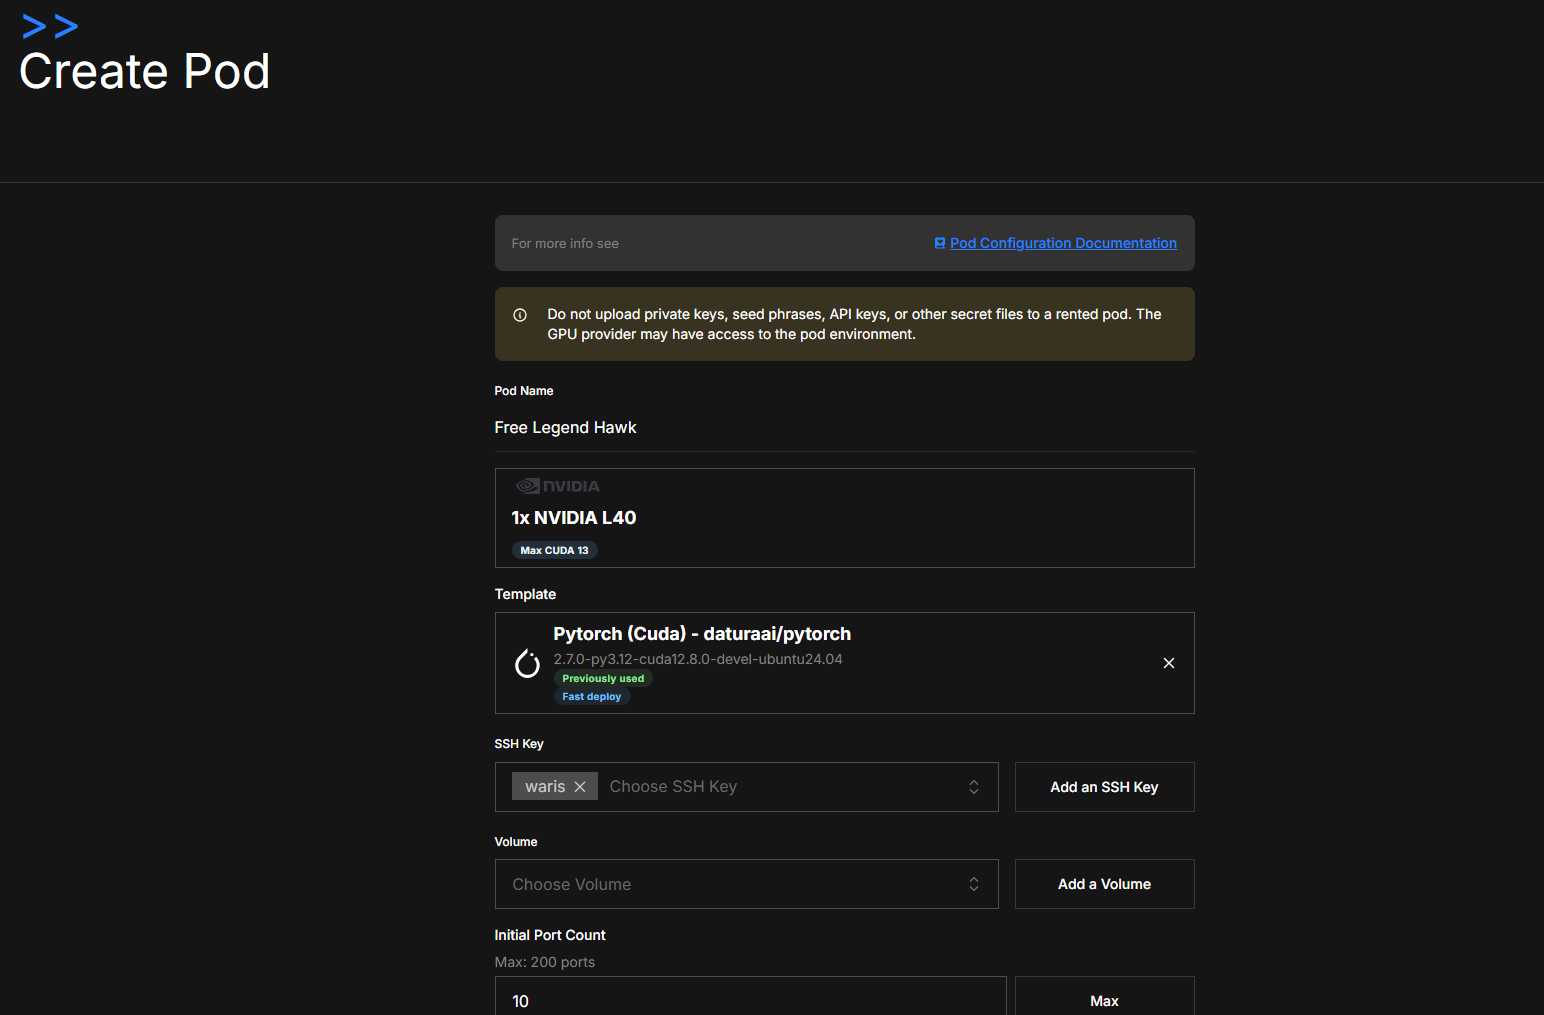
The page itself reminds you: "Do not upload private keys, seed phrases, API keys, or other secret files to a rented pod. The GPU provider may have access to the pod environment."
If you must run sensitive workloads, filter for Confidential Computing machines on Browse Pods. Full model: Pod security and CVM guide.
The fields, top to bottom
Pod Name
Auto-generated like Proud Machine Cloud. Click and rename to anything you'll recognize in the Your Pods list later.
Template
The Docker image your container is built from. The default is the most-used template for the chosen GPU (Pytorch (Cuda) - daturaai/pytorch for most NVIDIA cards), pre-cached on the host so deploys finish in ~1 minute.
- Click the × on the template card to swap. The picker drawer marks the host's canonical image with a blue Fast deploy badge and shows a green Previously used badge on templates you've deployed before.
- After picking, watch the right-hand summary's Est. Deploy Time row. A small cached badge there means the image is on this specific node right now (deploy in seconds); no badge means a pull is needed (1–10 min).
- Need something specific (vLLM, SD-WebUI, your own image)? See Templates for picking and creating one.
SSH Key
The chips show which keys will be installed in ~/.ssh/authorized_keys on the pod. The dropdown picks from existing keys; Add an SSH Key opens an inline form to paste a new public key — same as Access → SSH Keys.
You need at least one SSH key to reach the pod.
Volume
Optional. Mount an external Volume at /mnt so data survives pod termination. One volume per pod at a time.
If you don't attach a volume, anything outside the pod's local mount (/root) is gone when the pod is deleted.
Initial Port Count
How many TCP ports to forward from the host. Each pod gets a port range; one is used for SSH, the rest are free for your services (Jupyter, vLLM, etc.). The right side shows the host's max — click Max to grab them all.
Auto-Termination (Optional)
Type a number of hours and the pod will be deleted automatically when it elapses. Cheap insurance against forgetting. You can also set this later — see Scheduled termination.
Install Jupyter
Tick the box and the pod's startup script installs JupyterLab and exposes it on a forwarded port. The pod detail page will show the URL.
Restore (optional)
Bring a backup into the new pod's filesystem on first boot.
- Volume path is fixed to
/root— the local volume mount where your backup will be extracted. - Click Select a Backup to pick one of your existing archives, or tick Enter backup ID directly to paste a UUID.
Full details and path rules: Restores.
# of GPUs (when GPU splitting is on)
If the host supports GPU splitting, a count selector appears. The provider sets a minimum (e.g. 2 of 8); you can pick any count between that minimum and the host's total.
CPU, memory, and storage are sliced proportionally to the GPU count you take:
cpu       = total_cpu      × rented_gpu_count / total_gpu_count
memory_gb = (total_mem_gb - 2) × rented_gpu_count / total_gpu_count
disk      = free_disk      × rented_gpu_count / total_gpu_count
volume_limit  = int(disk × 2 / 3)
storage_limit = int(disk × 1 / 3)
Advanced — Skip agent SSH key
The platform installs a small agent key alongside yours. It powers the web terminal and pod-health checks. Untick Skip agent SSH key to remove it — you'll lose the web terminal and we can't tell the GPU provider if SSH breaks. Default: leave it on.
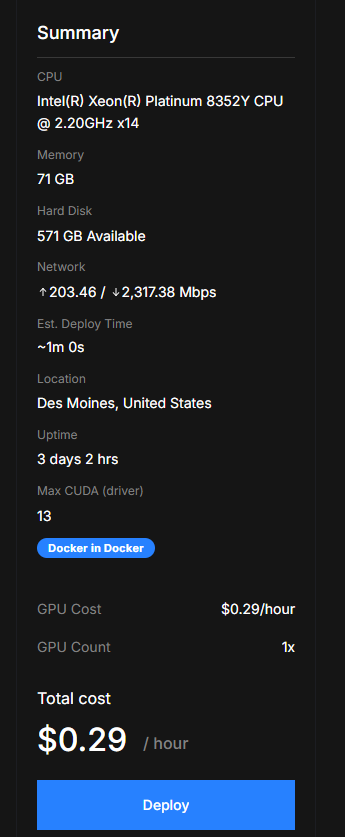
Right-hand summary
The summary panel mirrors your selections — CPU, memory, hard disk, network, estimated deploy time, location, max CUDA driver, GPU cost per hour, GPU count, Total cost / hour. Only the Total cost number includes splitting; verify before you click Deploy.
After deploying
Click Deploy, and the pod appears in Your Pods with status PROVISIONING then RUNNING. From there:
- Copy the SSH command from the SSH CONNECTION strip on the pod detail page.
- Connect Discord and request a private provider support channel if you need help with the running pod — see Discord support.
- Set up automated Backups.
- Schedule termination if you forgot during creation.
If a pod ever shows a red BROKEN status, the provider force-closed it — you're credited and it can only be deleted. See Broken pods.