Volumes
A Volume is persistent storage that lives outside any single pod. Attach one to a pod and the data survives pod termination, can be moved to another pod later, and never has to fit on the host's local disk.
When attached, the volume is mounted at /mnt inside your container. Use it for datasets, model weights, training checkpoints, evaluation outputs — anything you don't want to lose when a pod is deleted.
Volumes are backed by S3-compatible object storage. Throughput is fine for streaming/loading, but sustained random I/O is slower than the pod's local disk. For tight inner loops, copy the working set into
/rootand write results back to/mnt.
Create a volume
In the dashboard:
- Click Volumes in the sidebar.
- Click ADD NEW + (top-right).
- Enter a Name (letters, digits, hyphens, underscores, dots, spaces, and
,()!?/— max 100 chars). Description is optional. - Create.
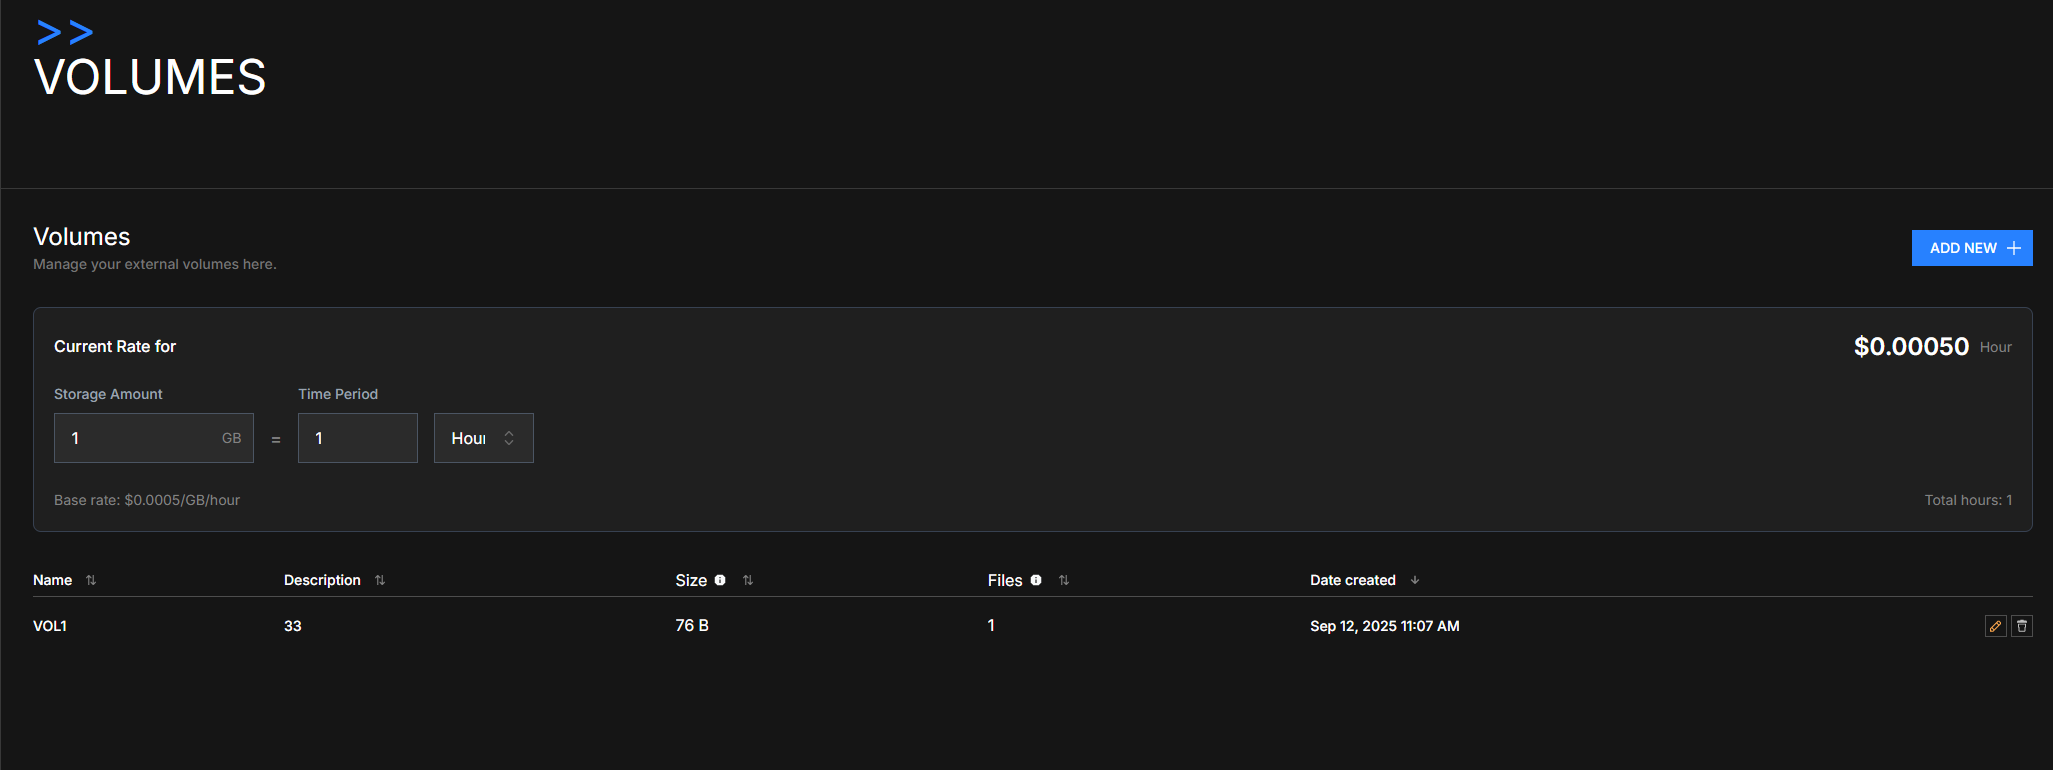
The page shows your volumes with their Size, Files, and Date created. The Current Rate widget at the top is a calculator — set Storage Amount × Time Period to estimate hourly cost.
Attach a volume to a pod
When deploying a pod (Browse Pods → RENT NOW):
- Find the Volume field on the Create Pod form.
- Open Choose Volume and select an existing volume — or click Add a Volume to create one inline.
- Deploy. The volume mounts at
/mntautomatically.
Forgot to pick one at deploy time? Open the pod detail page and click Volume in the action bar. It works only while the pod has no volume yet.
Pick the right volume before you attach it. Once a pod has one, the Volume action is grayed out and the API rejects the change, so it can't be swapped for a different volume or detached while the pod runs.
To stop using a volume on a pod, terminate the pod. The data on the volume survives that.
The reverse is not restricted: the same volume can be attached to more than one pod at a time, including pods on different nodes. Each pod mounts the same bucket, so they all see the same files.
Nothing coordinates those pods. Two pods writing the same file will not merge their changes, the last write wins. And the check that stops you deleting a volume that is in use only looks at one pod, so with several pods attached it can let the deletion through. Deleting a volume destroys the data for every pod still using it.
You can attach a volume to a Docker-in-Docker template — nested Docker keeps working and /mnt stays writable. Files on the volume belong to root inside the pod, and permissions you set on them are stored with the objects.
On a small number of nodes the volume still turns Docker-in-Docker off. The deploy log says so when it happens; move the pod to another node if you need both.
Use it from inside the pod
# SSH into the pod
ssh root@<pod-ip> -p <pod-port>

# Volume is at /mnt
ls /mnt
df -h /mnt    # confirm it's mounted

# Suggested layout
/mnt/
├── datasets/      # input data
├── models/        # trained weights you want to keep
├── checkpoints/   # in-progress training state
└── outputs/       # results, evaluation reports
Tip: keep the working set on /root (the local mount, fast disk) during training, then rsync /root/checkpoints/ /mnt/checkpoints/ between epochs. Reads from /mnt leave the bucket and are billed as egress (see Billing); writes into /mnt are not.
Billing
- Charged per-GB / per-hour based on the actual data stored, not the allocated capacity.
- Continues to accrue while the volume is detached — your data stays available.
- Stops only when you delete the volume (irreversible).
- Storage is billed at $0.00005 per GB-hour (about $0.036 per GB-month); the Volumes page calculator at the top of the list uses the same rate.
- Egress is billed at cost, per GB. Data transferred out of a volume — every read of
/mntfrom a pod (loading a dataset, copying the working set to/root), a restore to a pod, a download — is charged at what AWS bills Lium for that bucket's data-transfer line items on that day (AWS's published list rate is $0.09 per GB for the first 10 TB a month in US regions as of September 2026, tiers applying to Lium's account as a whole; see AWS S3 pricing, "Data transfer"). There is no free tier. Lium covers writes into the volume, requests (PUT/GET) and the other S3 line items. - Each day's charge is one line per volume in your billing history; the storage and egress parts are shown separately per day in the volume cost breakdown (
GET /api/volumes/costs?start_date=…&end_date=…returnscustom_storage_cost,egress_costandchargeable_costper volume-day;cost_type=egressnarrows the totals to egress).
Delete a volume
In the Volumes list, click the trash icon on the row. This permanently destroys the data — there is no undo and no archive.
If you might want the data back, take a Backup of the relevant pod first, then delete the volume.
Limits & rules
| Rule | Detail |
|---|---|
| Mount point | Always /mnt |
| Volumes per pod | 1, fixed once attached |
| Pods per volume | No limit — they all mount the same bucket, with no locking |
| Size cap | None — volumes scale automatically |
| Name pattern | [a-zA-Z0-9\s\-_.,()!?/]+, 1–100 chars |
For agents and automation: API + CLI
# List your volumes
curl https://lium.io/api/volumes \
  -H "X-API-Key: $LIUM_API_KEY"

# Get one
curl https://lium.io/api/volumes/<volume_id> \
  -H "X-API-Key: $LIUM_API_KEY"

# Create one
curl -X POST https://lium.io/api/volumes \
  -H "X-API-Key: $LIUM_API_KEY" \
  -H "Content-Type: application/json" \
  -d '{"name": "my-dataset", "description": "Training data v2"}'

# Delete one (data is gone — no recovery)
curl -X DELETE https://lium.io/api/volumes/<volume_id> \
  -H "X-API-Key: $LIUM_API_KEY"
CLI: lium volumes list / new / rm (reference). Get an API key first.